


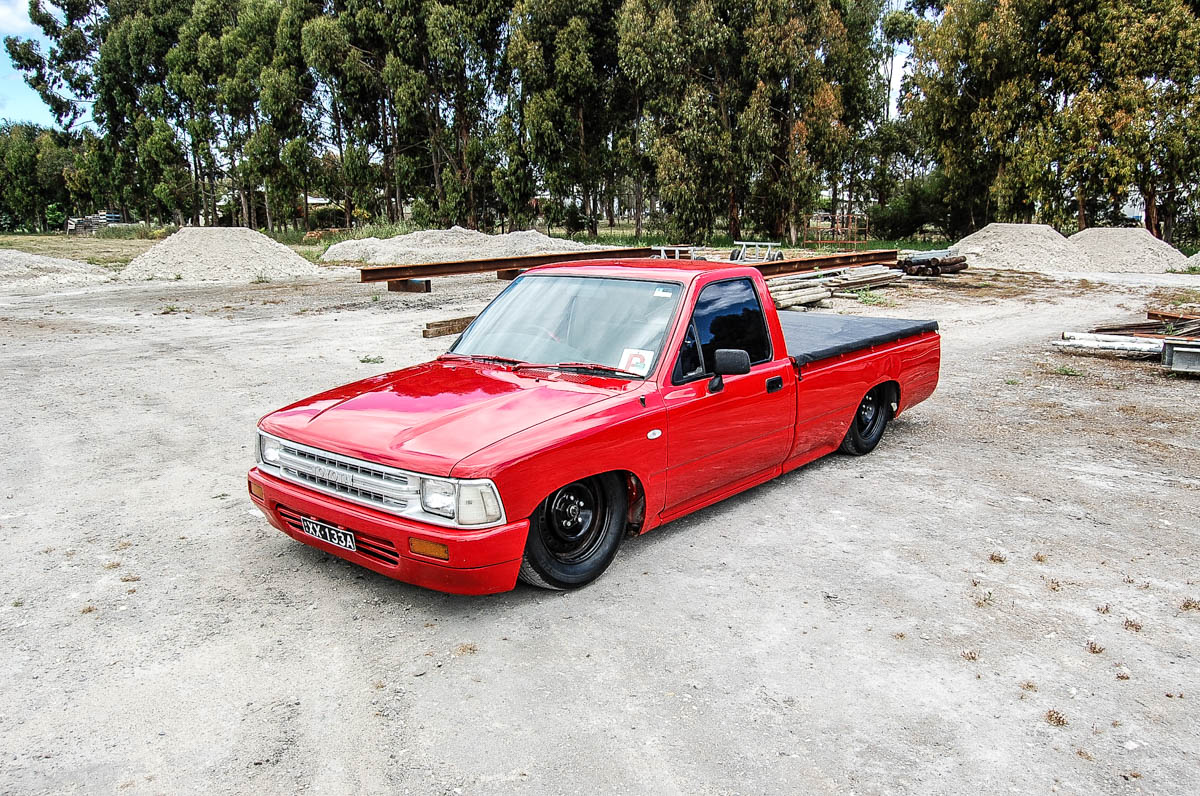
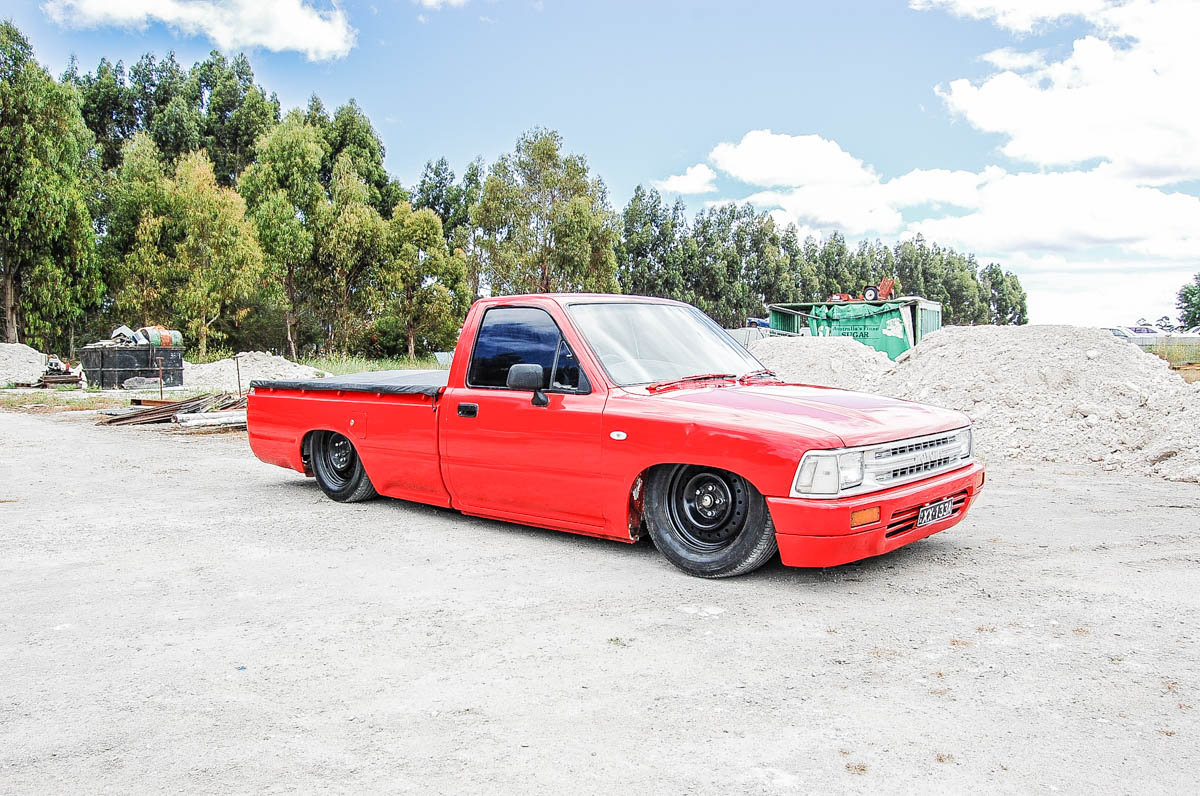
 When Jake first mentioned he wanted his Hilux bagged, I was pretty excited about being able to plan a bag job from start to finish with a set time frame and budget. I had a 2 week break in which I would do the rear, and then it would be coming back for another 2 weeks to do the front. Being exactly the same model as my own I already knew exactly what was involved and meant that little research was required.
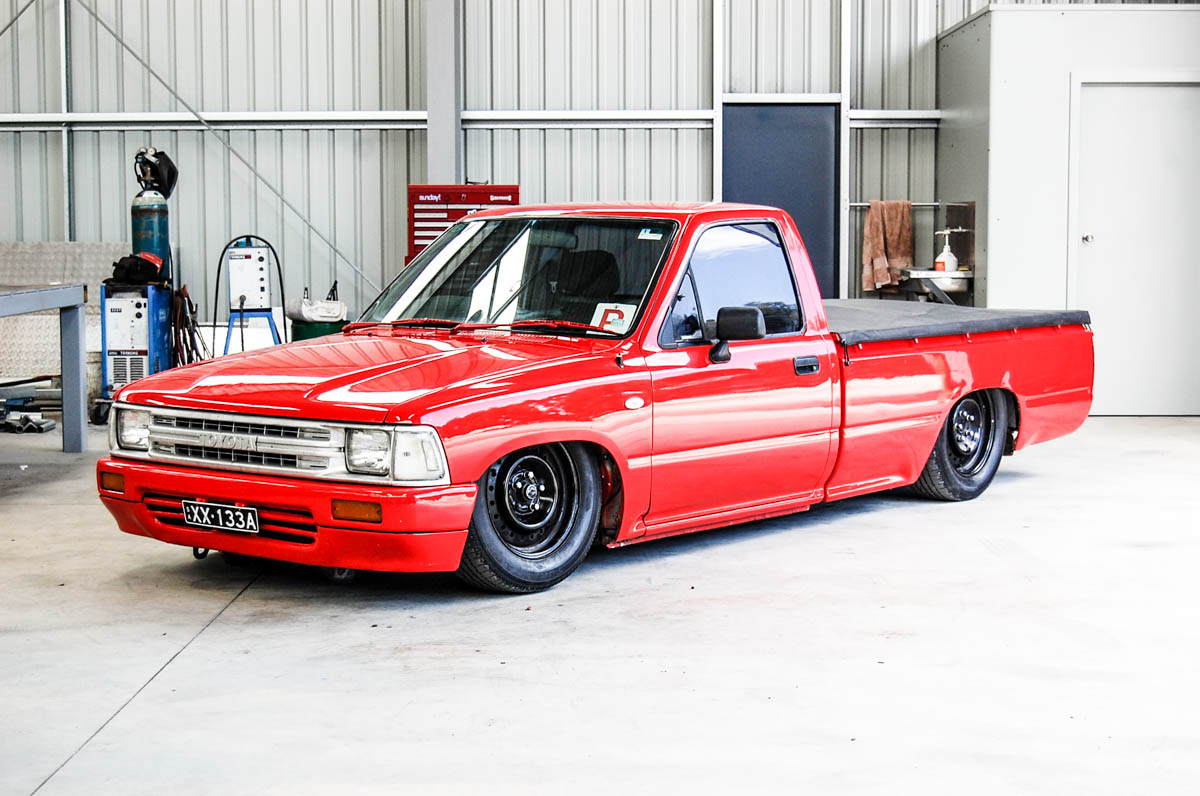
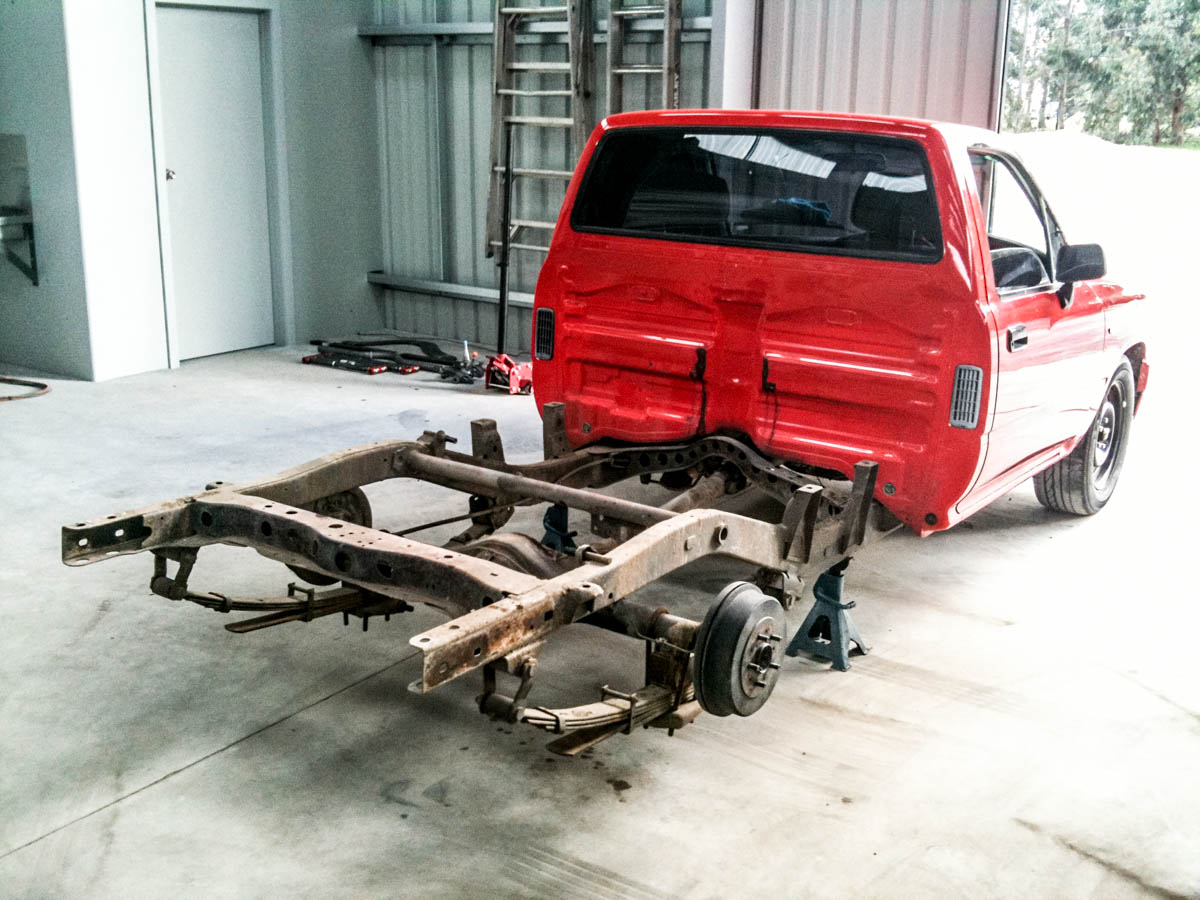 The starting base was pretty clean, which made things easy. No damage or repairs.
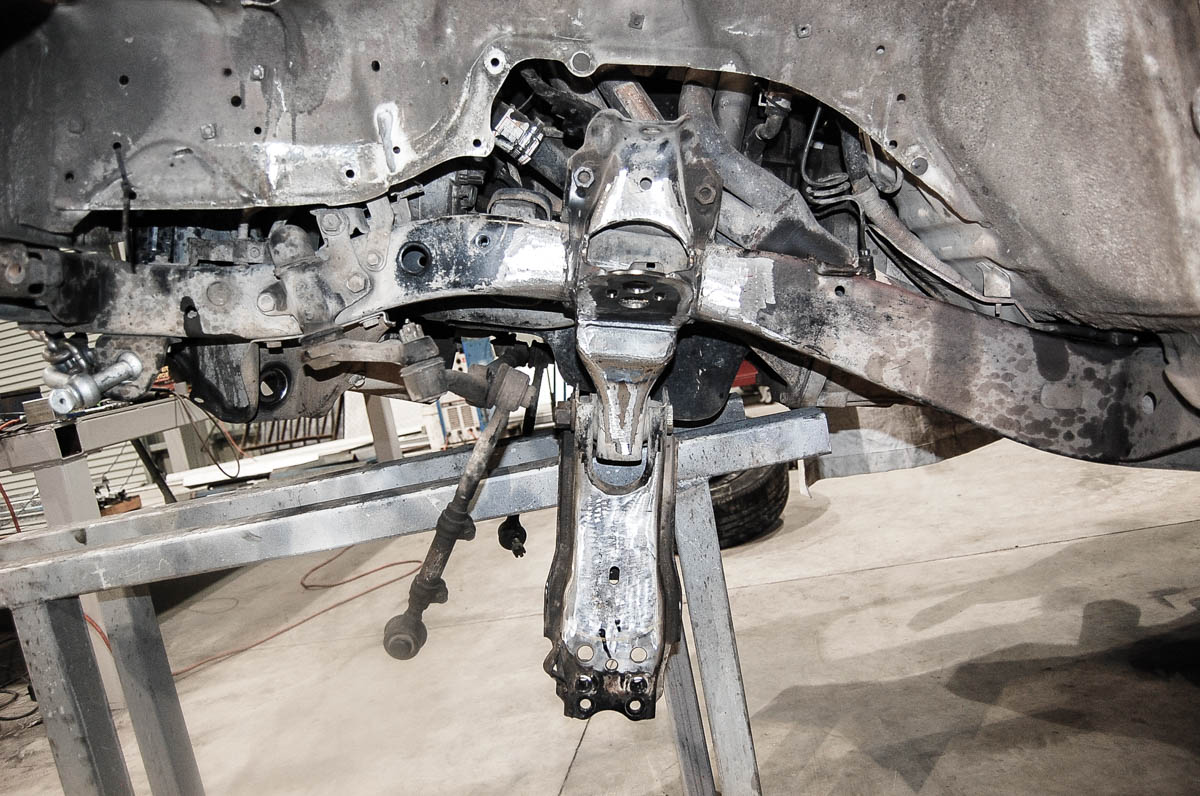
 I had the notch done in one solid day, which I was happy about.
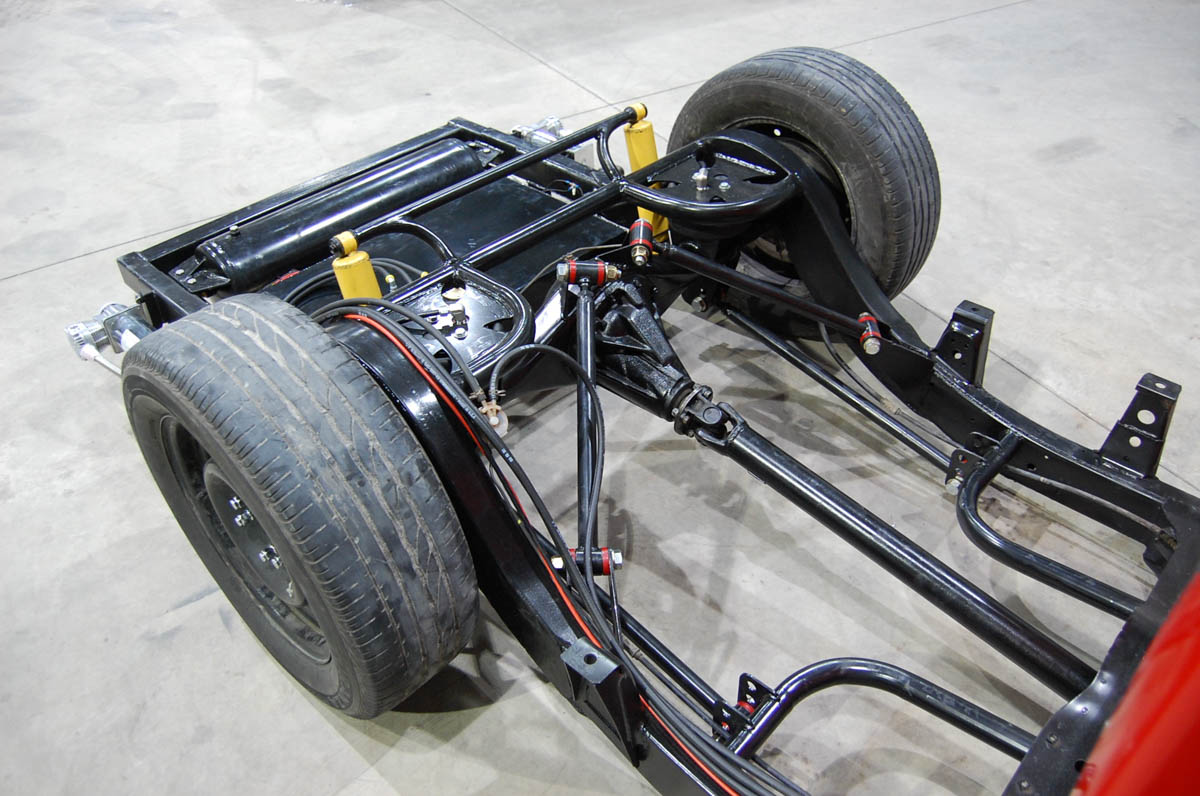
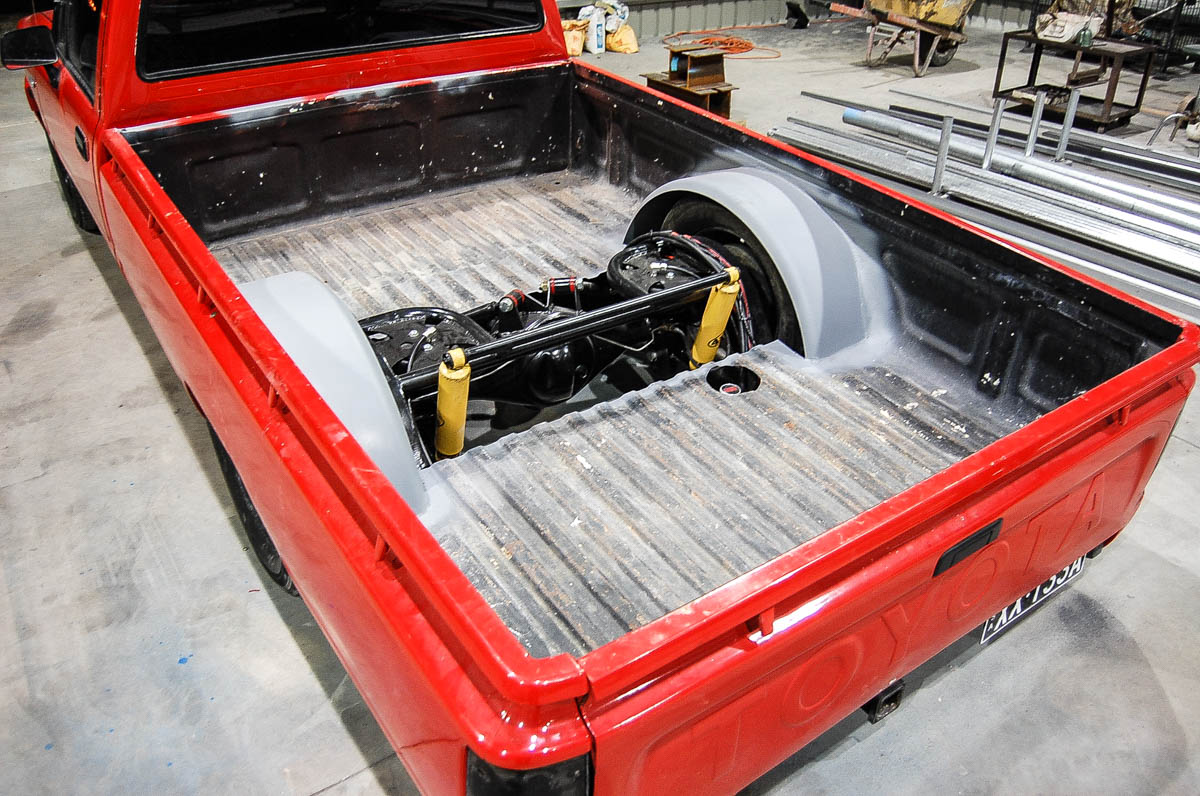
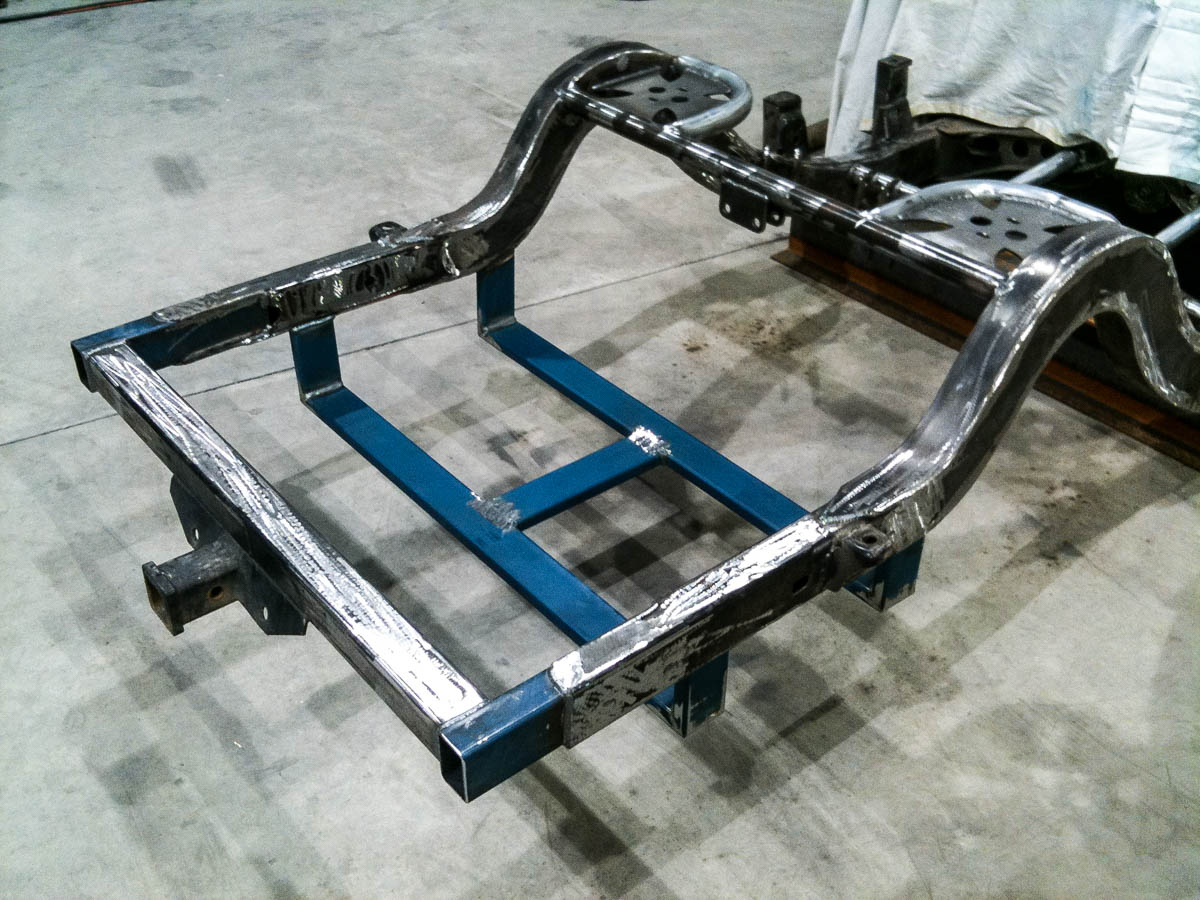 I used the existing tow bar as the rear cross member, which tied in perfectly. The Hilux was still going to be a work ute, so keeping the tow bar was essential.
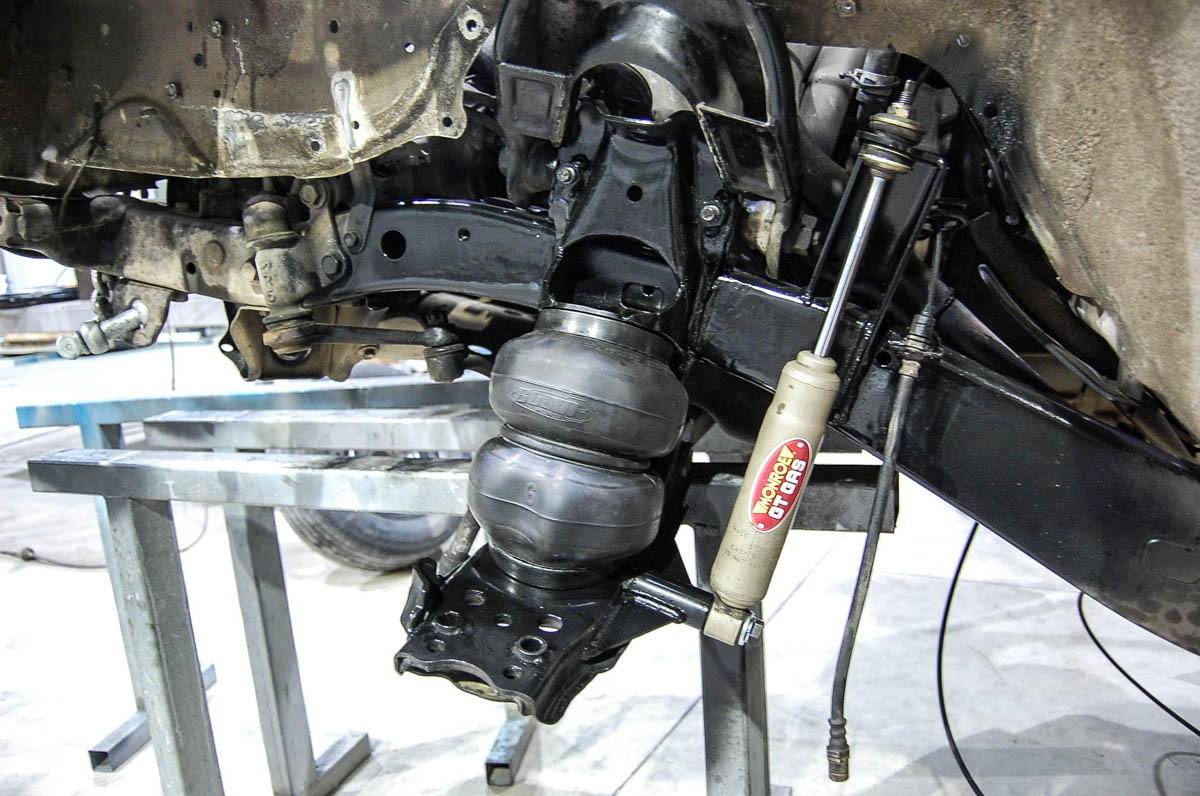
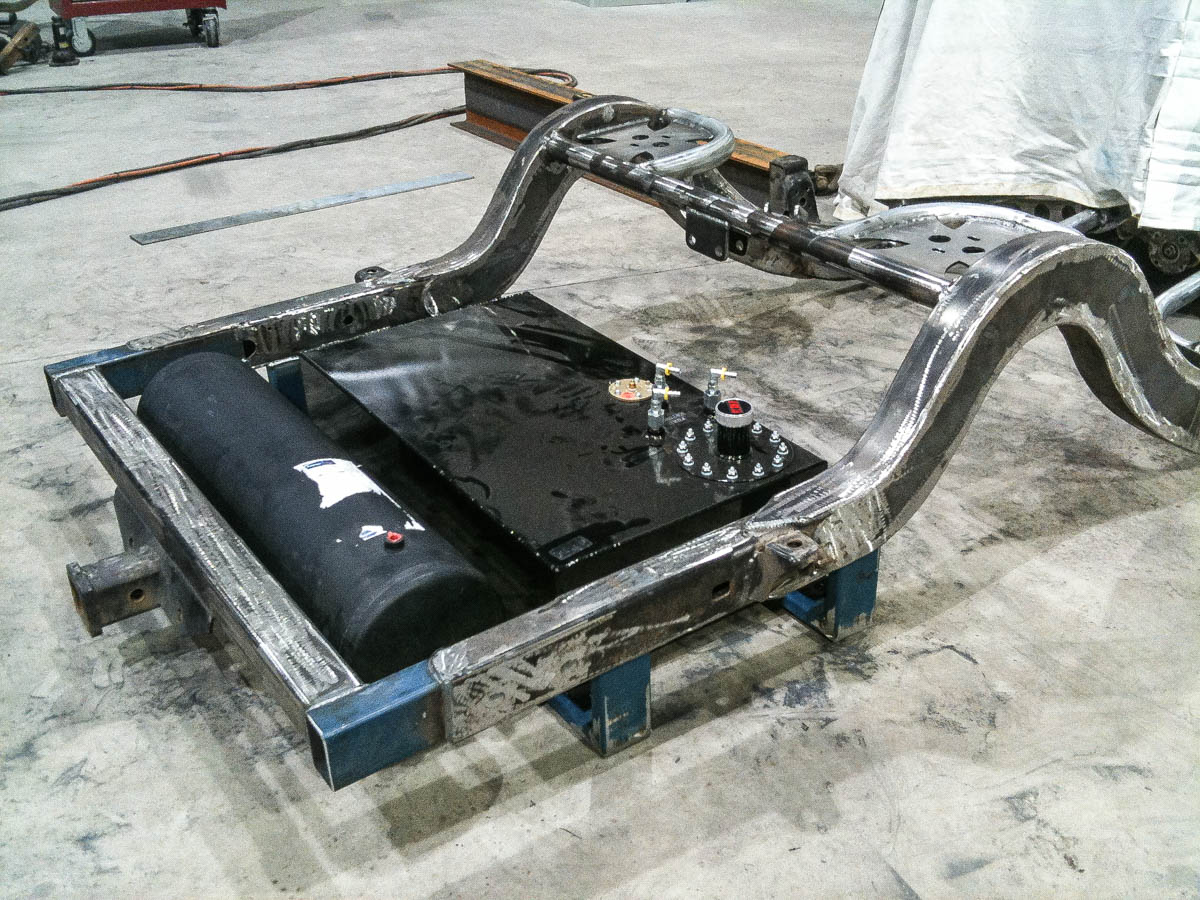 I used the same RCA fuel cell in my Hilux and I didn’t hesitate to get another one for this build. They are the perfect shape for an under tray mini truck build and come at a very reasonable price.
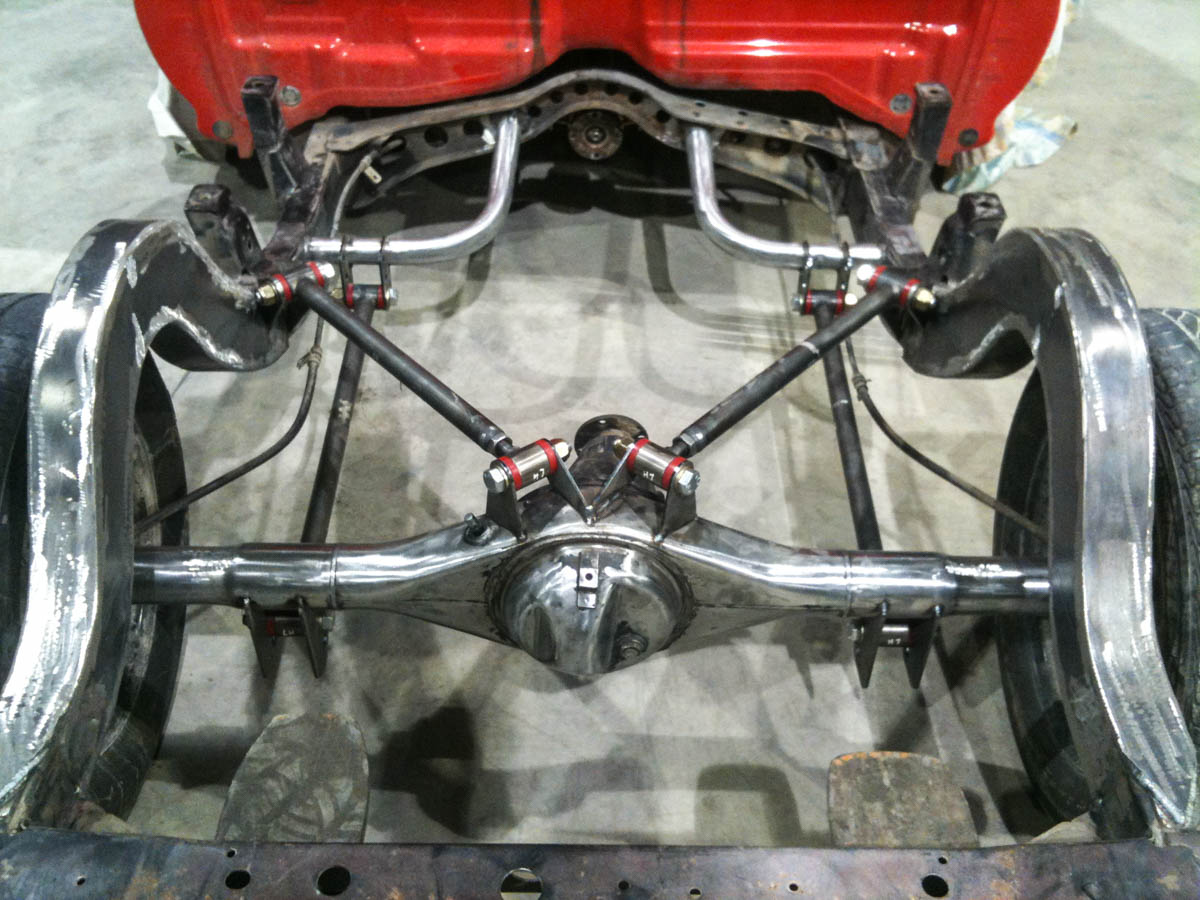 The 4 link was a universal DW Customs item. I had to make up my own brackets for the top bars to suit the layout I chose, and used the supplied brackets for the lowers.
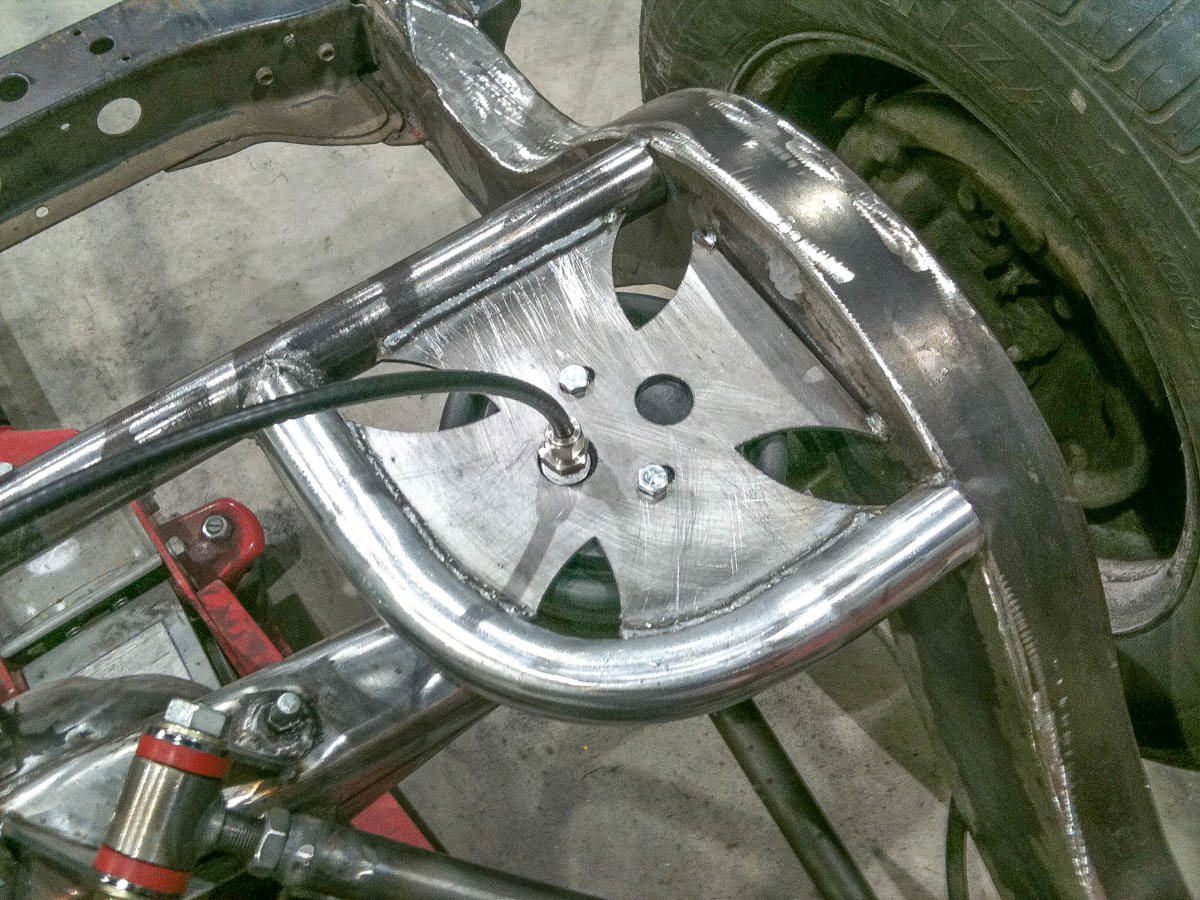 Off the shelf DW customs bag plates keep the design interesting and save me from 1 extra pair of plates needing cutting and designing.
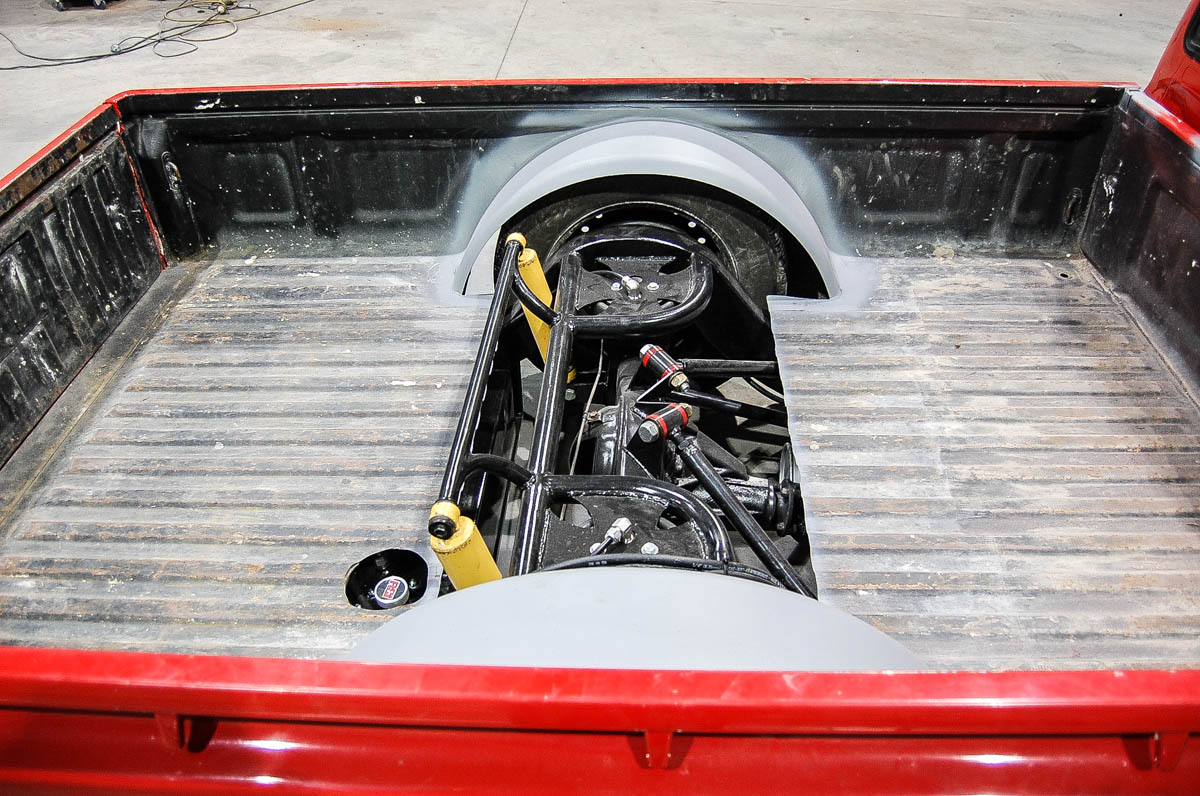
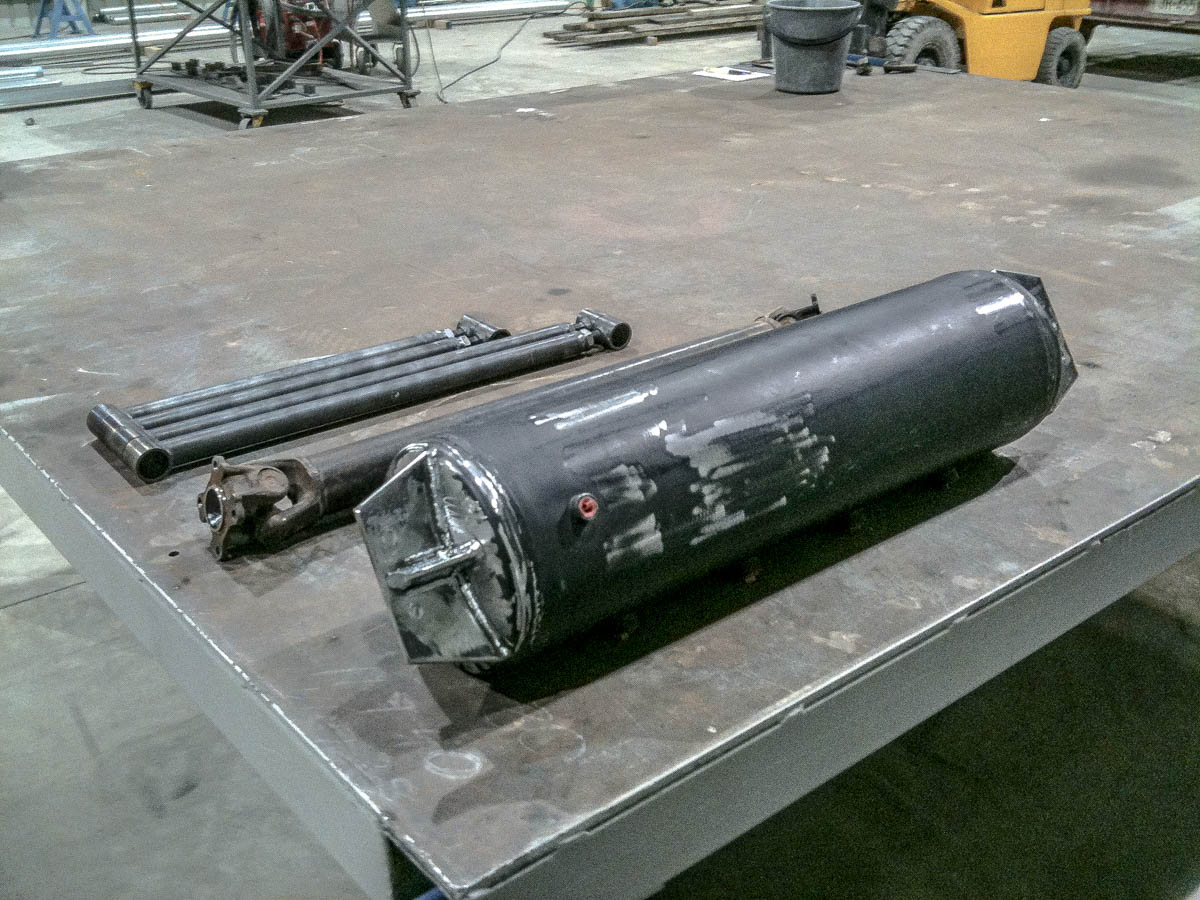 The air tank mounting wasn’t so simple, but I eventually came up with this minimal design that I was very happy with.
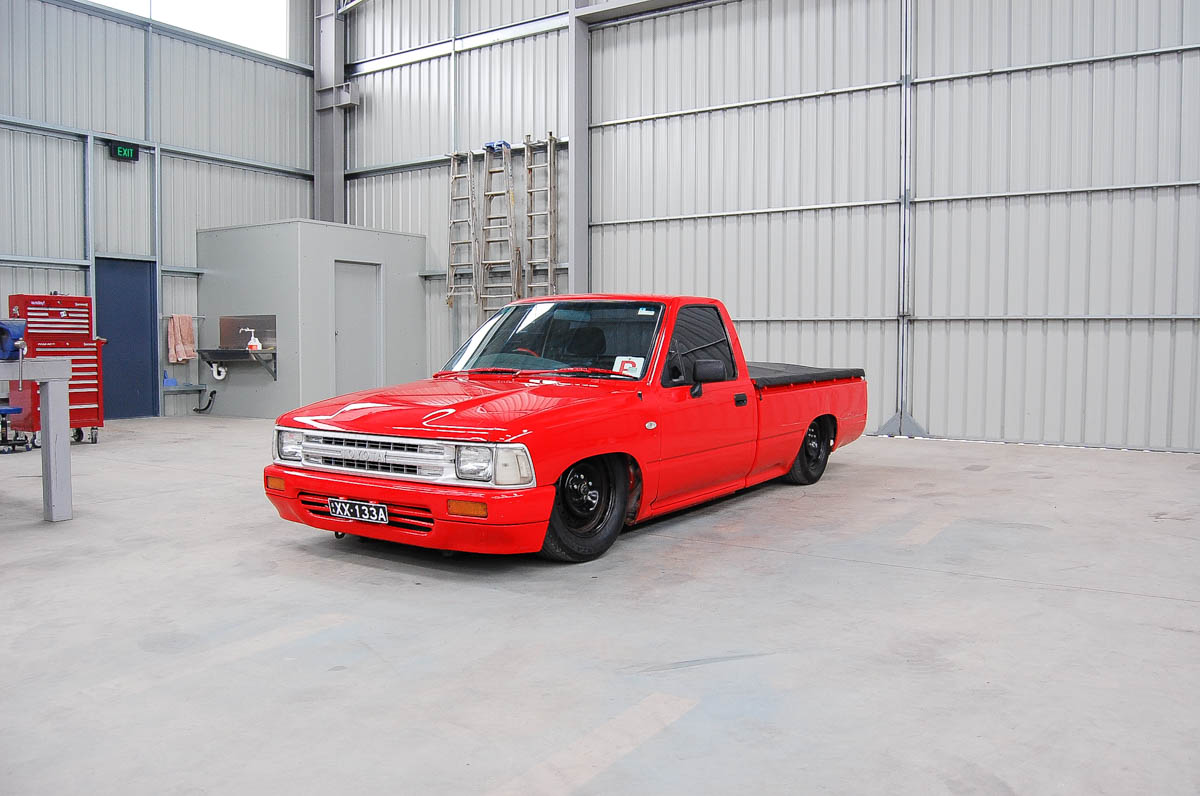
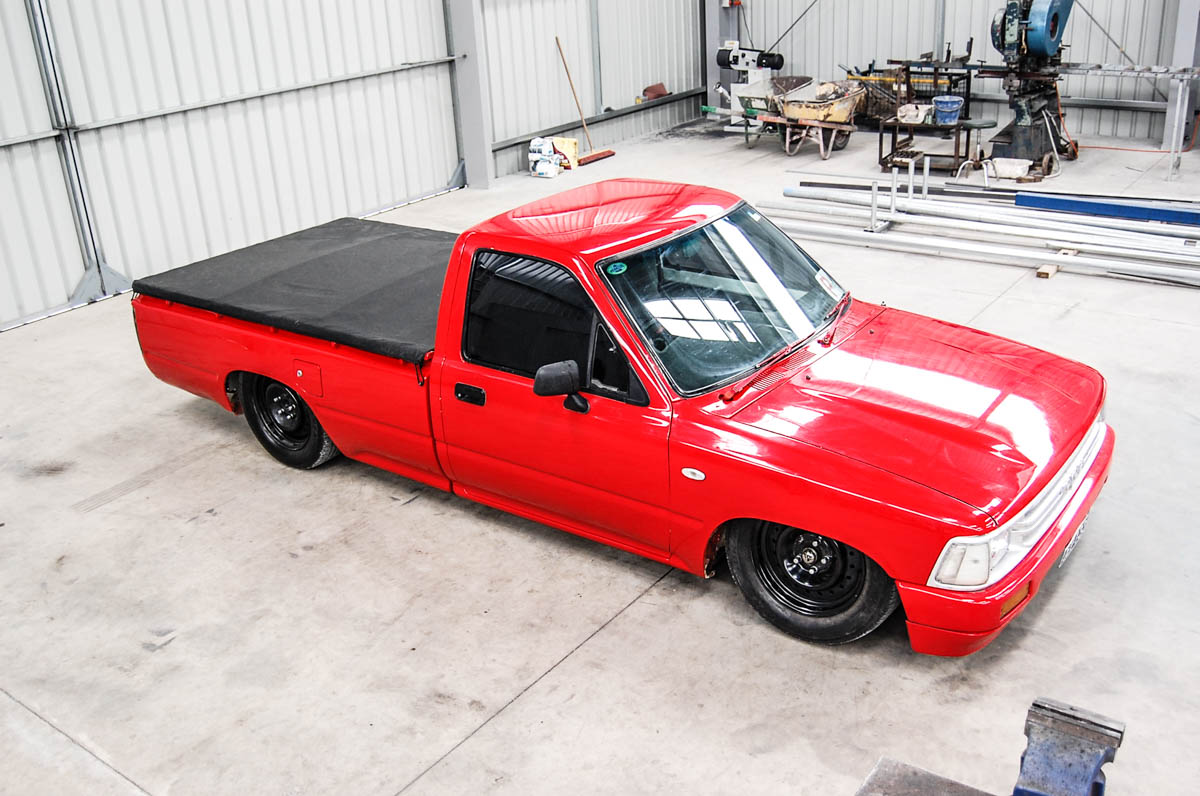
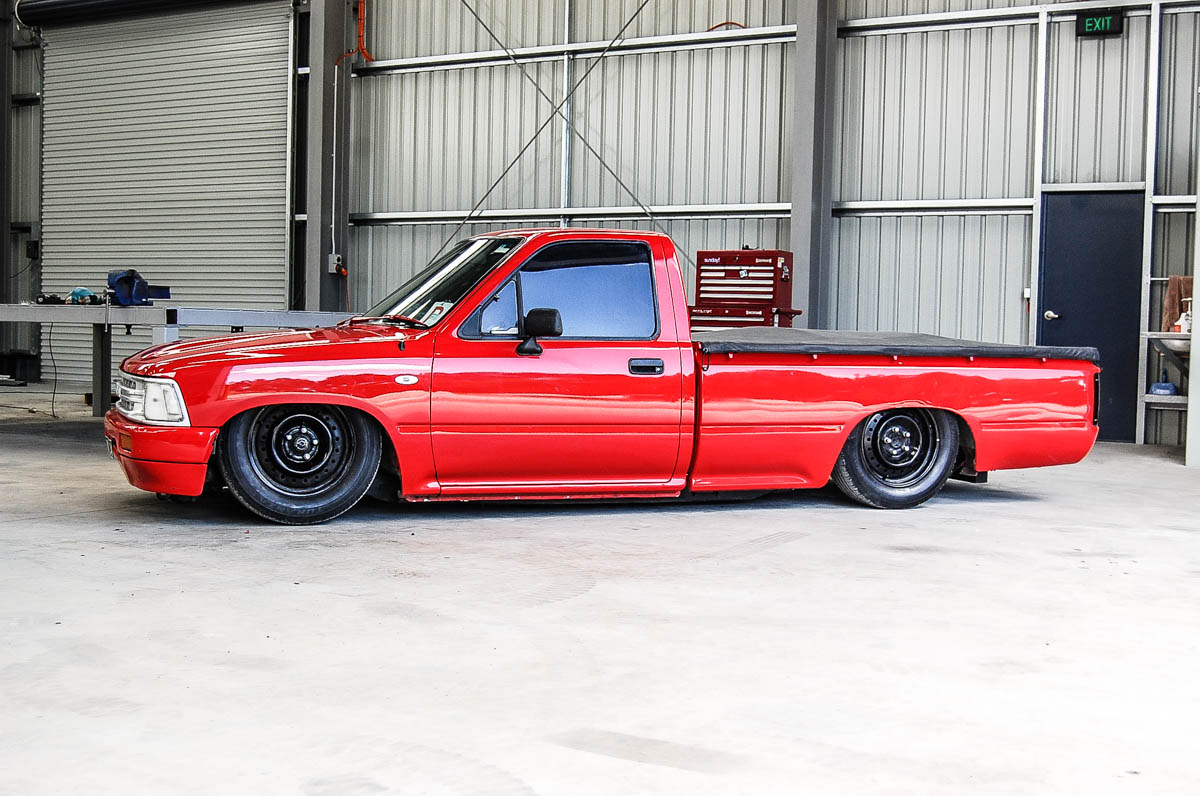
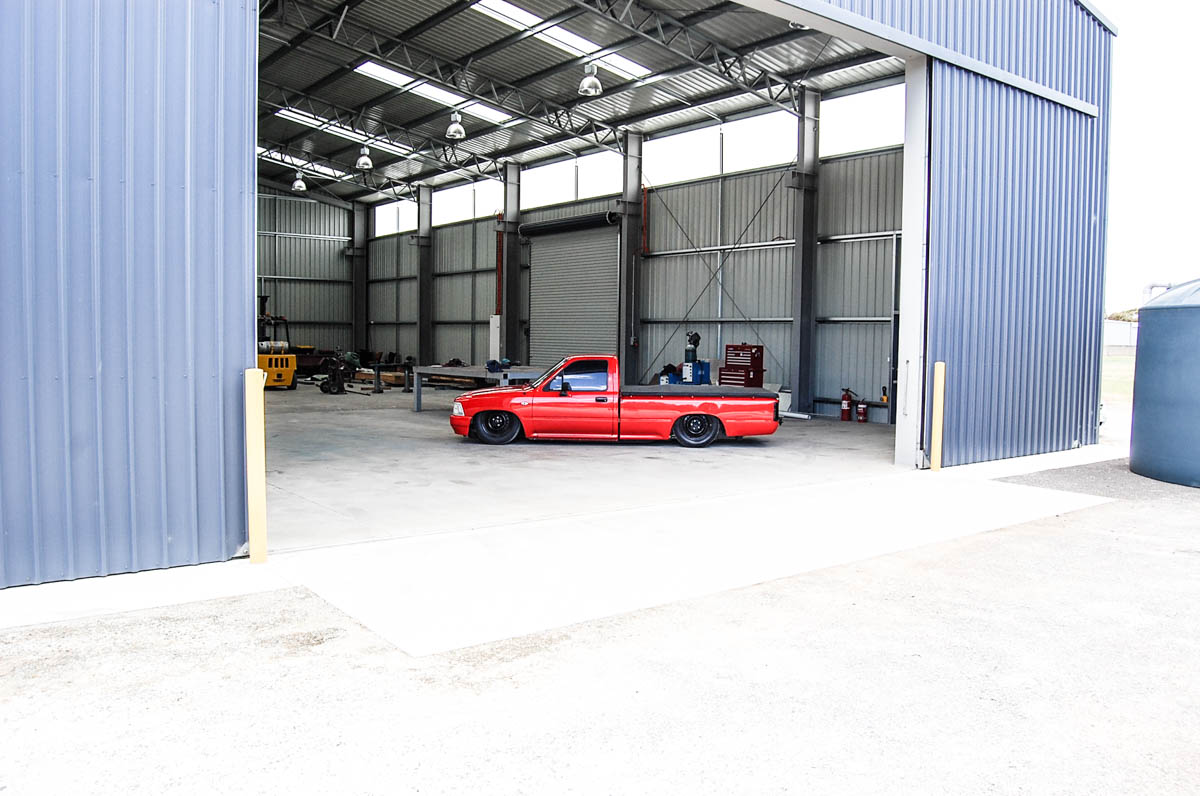
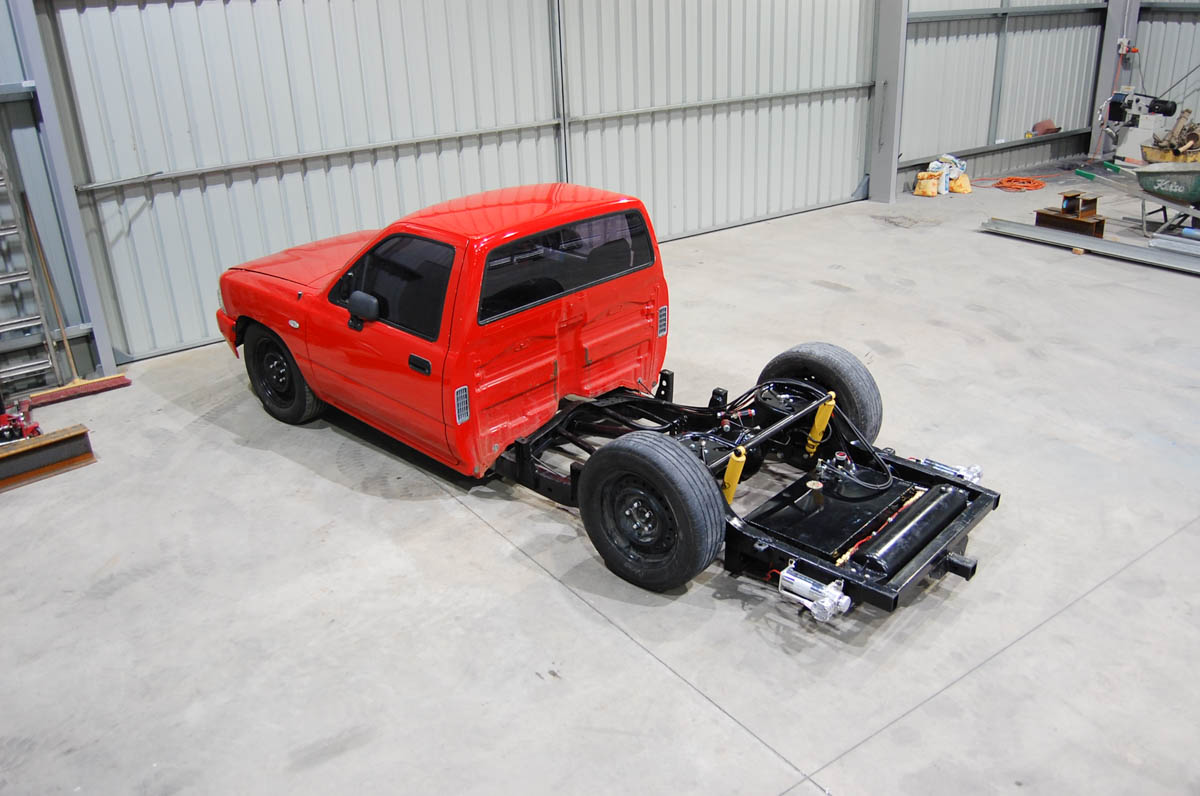 I really wanted to keep this build minimal and functional, which I think I achieved. This was both because it was being used as a work ute and I simply like that style.

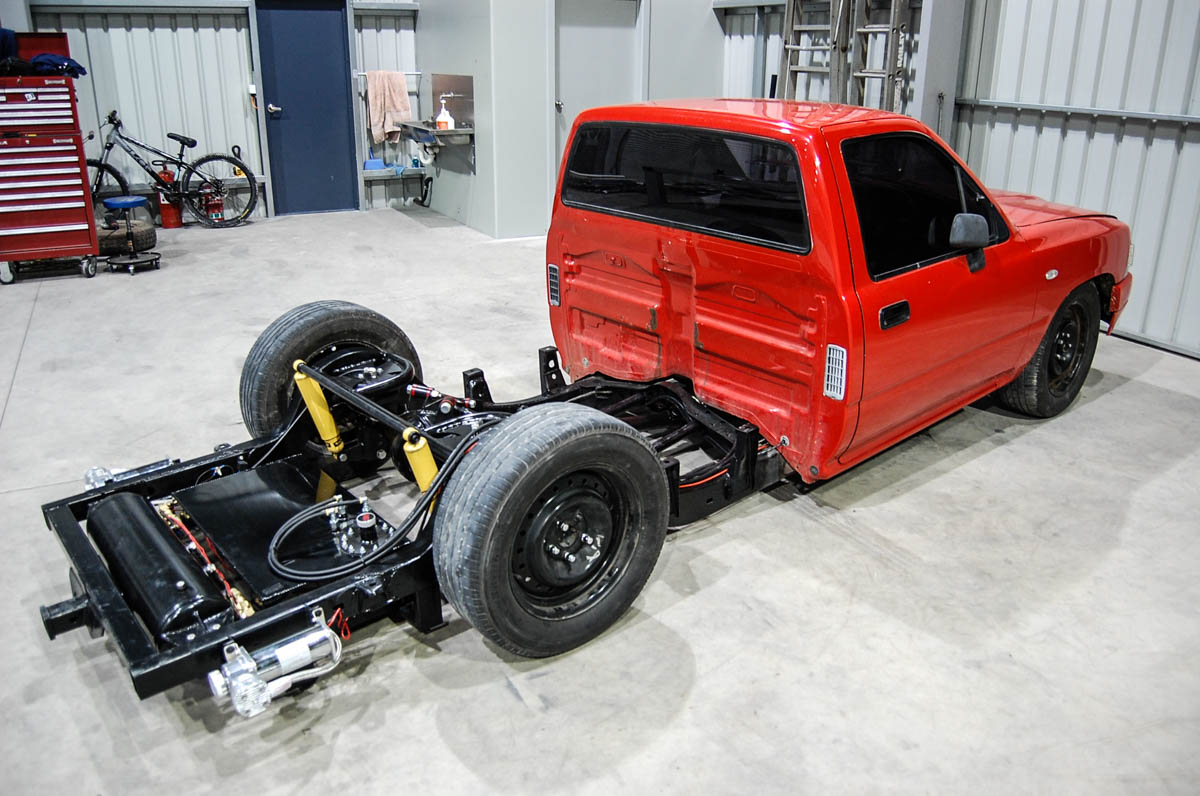
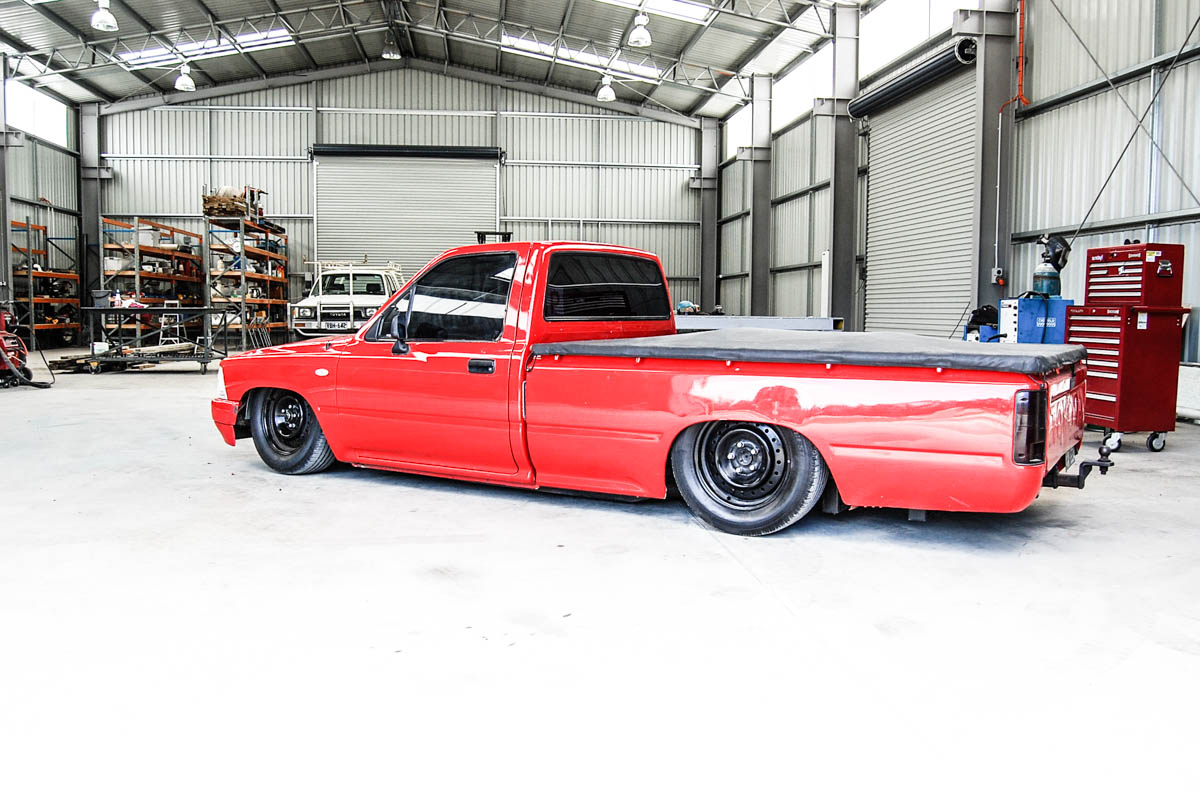
 The tubs where also kept minimal. The tight time frame meant there was no room for fancy sheet work.
 When it came back for the front it was straight into it. I spent a lot of time on my own Hilux getting the bag placement right and this meant that I knew exactly where to cut the second time around.
 Working on the high stands made for very good access, no need for a hoist!
 I used a DW shock relocation kit, which fitted up perfectly.
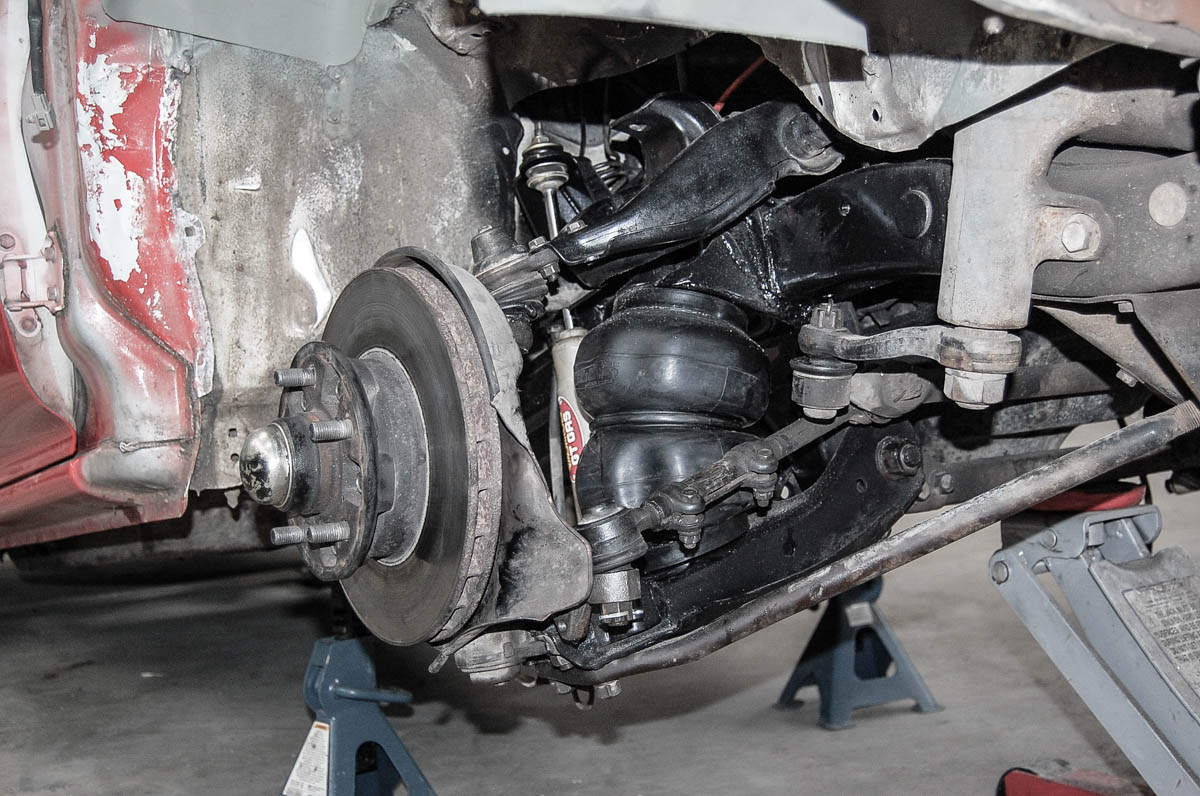 2 inch drop spindles keeping angles and clearances managable.
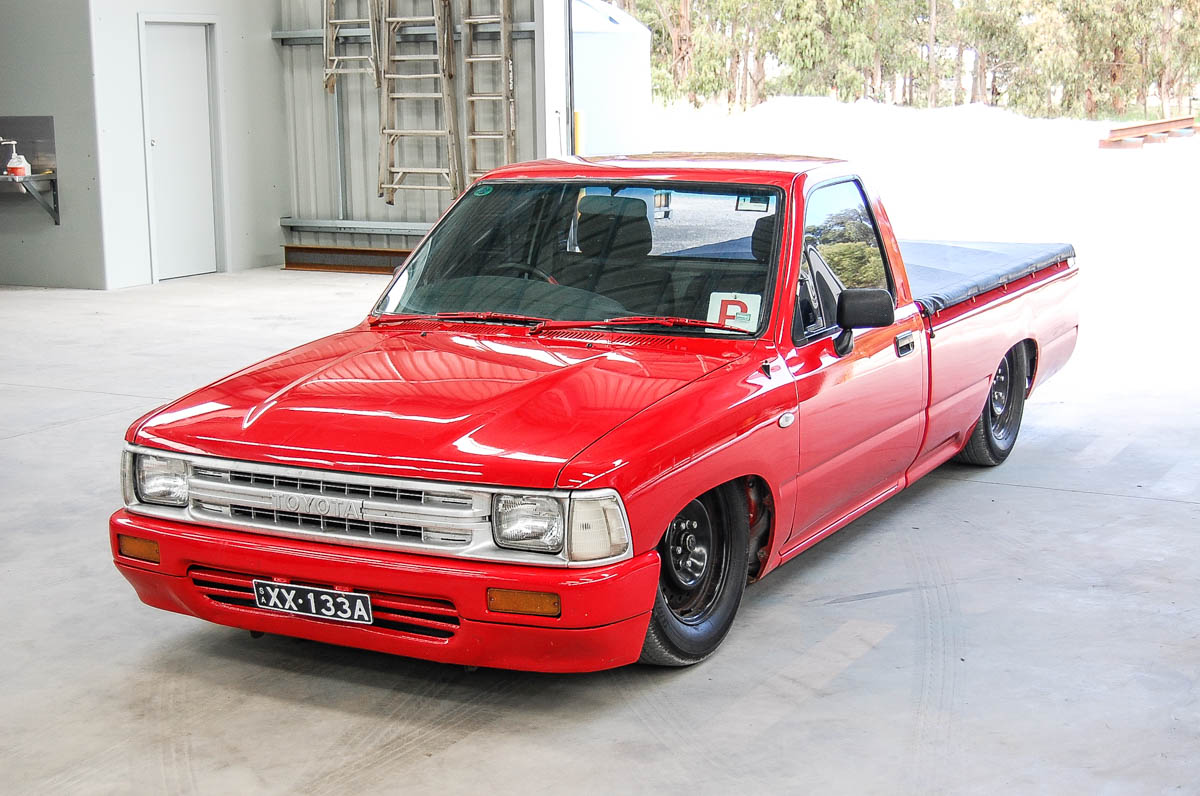
 All done!
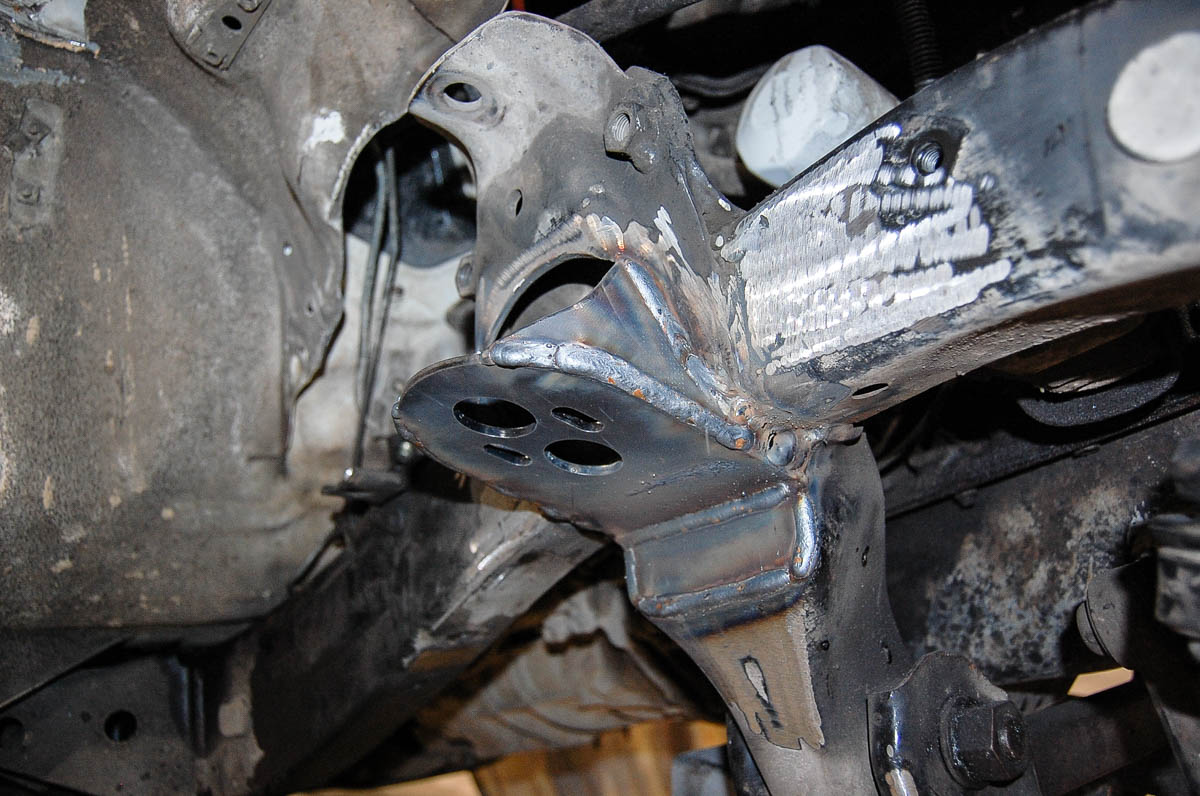
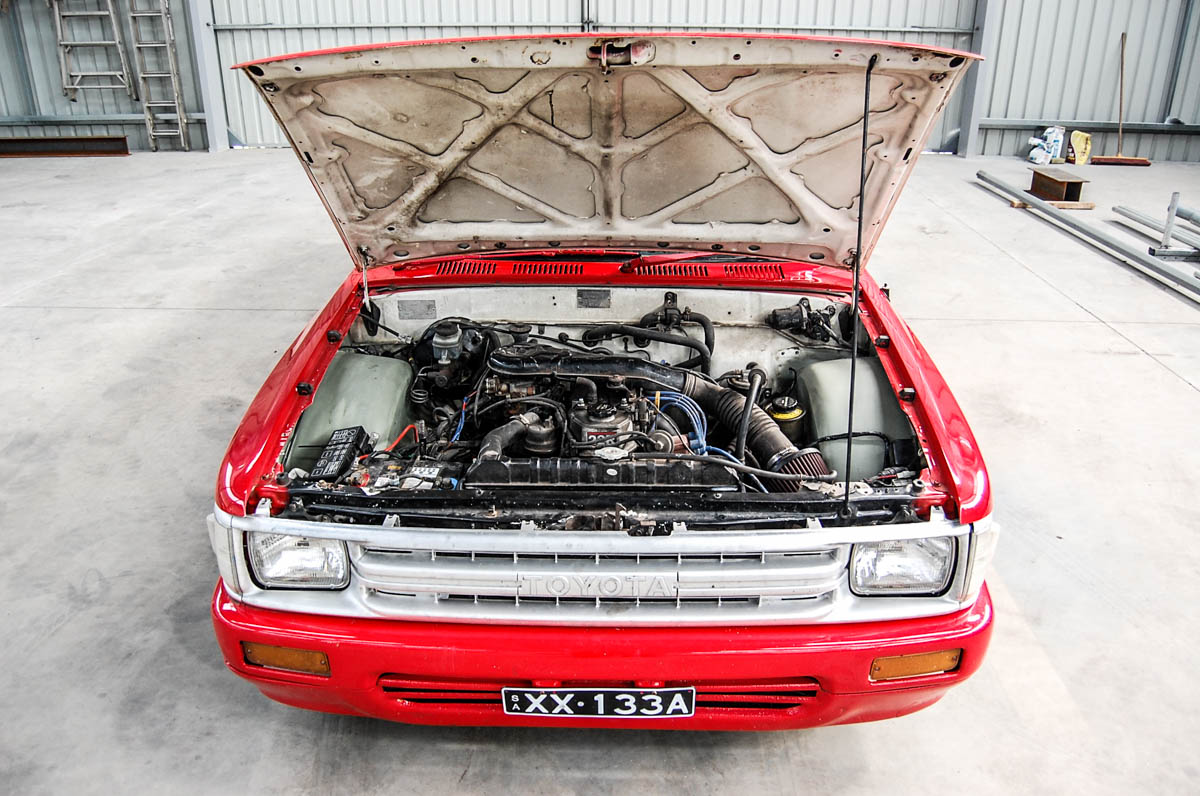 Once again, having already redone one of these engine bays made things a lot easier the second time around. I made the mistake of cutting a little to much out when I did mine, so I was able to make sure I didn’t do the same on this one.
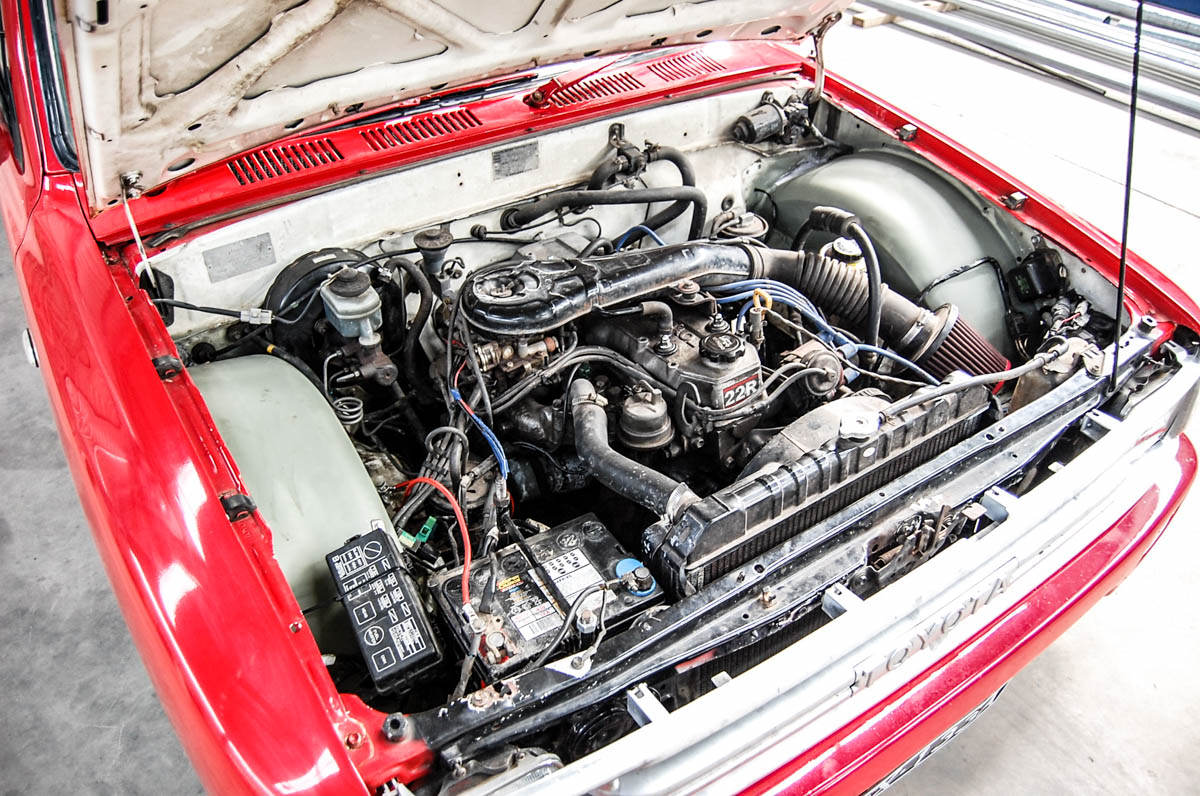 I was able to swap the brake booster for a pre 90’s one, which is smaller in diameter. With the drop spindles keeping the camber reasonable, there is good clearance between the booster and wheel.
 It was a sad day to see this thing leave. I would of loved to have this as a daily. Enjoy the rest of the snaps.

Hey there man! Love your work on thag red bagged hikux! I own a hilux of my own and im interested in bagging mine. Currently looking at shaving my tub then putting air bags in and was just wondering what kind of price are you looking at to bag a ute? Mines a dual cab hilux if that changes anything!
Cheers man. Ryan!
LikeLike
Hi Ryan,
Unfortunately I’m not in a position to do any major builds like that at the moment. Hopefully things change in the near future tho!
Jordan.
LikeLike
Hey there mate. Love the work on the red Hilux and your own. Wanting to do a similar set up but only on the rear of my own Hilux I’ve got. If you could share more information such as what and where you got the bags and fuel cell and brackets that would be awesome. I know it’s been awhile since this was put up but it’s great inspiration for someone my age with their first car 😊
Thanks mate.
LikeLike
Hi Than, glad to provide some inspiration. I got all my gear from a shop called DW Customs which has unfortunately closed now. Maybe check out airride suspension in melbourne. The minitruck forums and facebook pages are great for finding recourses aswell. Goodluck with your future build.
LikeLike
Hi. Ahhh okay that’s cool.
Yeah thanks I’ll have a look.
Thanks so far it’s been a good adventure.
LikeLike